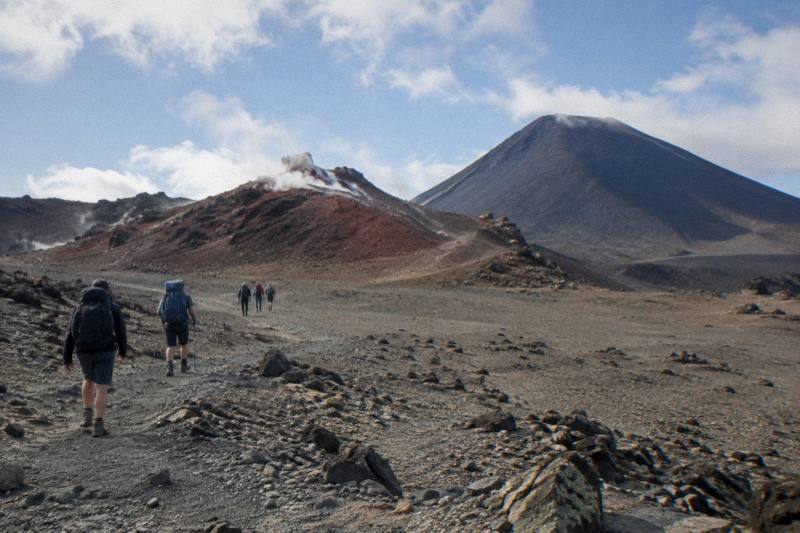
Photographing The Emerald Lakes On The Crossing: Light, Spots And Timing
The Emerald Lakes are the photograph most people walk the Crossing for. This guide covers where to stand, when the light cooperates, and how your start time, shuttle and tour choices change what your camera sees.
Short answer
The Emerald Lakes sit below Red Crater at 1886 m, reached after a steep scree descent on the 20.2 km Tongariro Alpine Crossing. Morning side light usually flatters them best. An early shuttle from Mangatepopo or a guided departure such as the Adrift Tongariro premium guided hike, from NZ$450, puts you there while the light is still working.
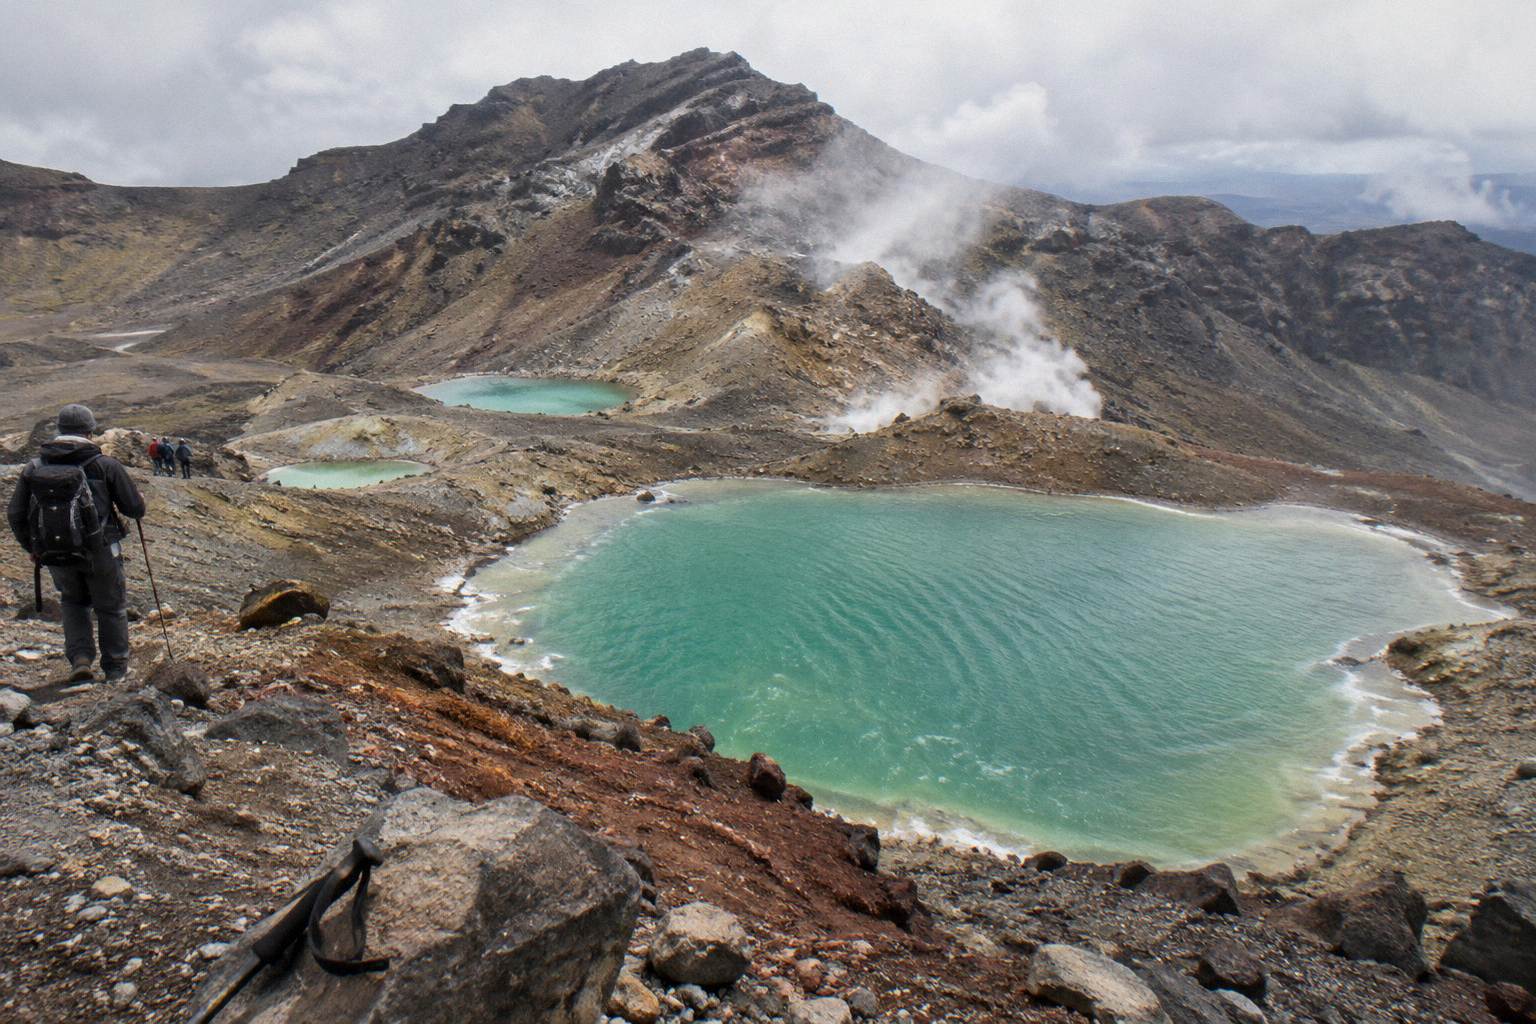
Few places in New Zealand get photographed as often as the Nga Rotopounamu, the Emerald Lakes, three mineral-bright pools sitting in a bowl below Red Crater on the Tongariro Alpine Crossing. DOC describes the approach as a steep scree descent to the vivid lakes, and that descent is where most of the hero shots are taken. The track runs 20.2 km one way with 1196 m of elevation change each way, and DOC rates the fitness requirement High, so the photography happens inside a long, physical day rather than around it.
This page is part of the on-the-day series. For the wider picture of why the water glows the colour it does, read how the Emerald Lakes get their colour.
| Quick Facts | Detail |
|---|---|
| Track | Tongariro Alpine Crossing, 20.2 km one way |
| Lakes elevation | Below Red Crater, highest point 1886 m |
| Walking time | 7 to 8 hours November to April, 9 hours May to October (DOC) |
| Best light | Morning side light from the Red Crater ridge and upper scree |
| Access rule | Do not touch or enter the lakes, a request from local kaumatua |
| Getting there | Shuttle or guided tour; summer road-end parking is capped at 4 hours |
Why The Emerald Lakes Are The Crossing's Signature Photograph
The lakes combine three things a camera rarely finds together: saturated colour, an obvious focal point, and a descent that hands you a changing angle every few steps. Most Crossing walkers reach them after the hardest climb of the day, tired, at altitude, with a red crater wall behind and steam-tinged mineral water below. That combination is why the lakes, not the summit ridge, are the image most people carry home.
DOC's own track description singles the lakes out on the way down from Red Crater, which sits at 1886 m, the highest point of the walk. The colour comes from dissolved minerals washed down from the thermal area above, which is also why the water must stay untouched: kaumatua Te Ngaehe Wanikau asks visitors to respect the maunga tapu by not touching or entering any of the waterways, including the alpine lakes. For a photographer that request is simple to honour. You never need to go to the water's edge to make the strongest picture, and the best compositions come from well above the shore anyway.
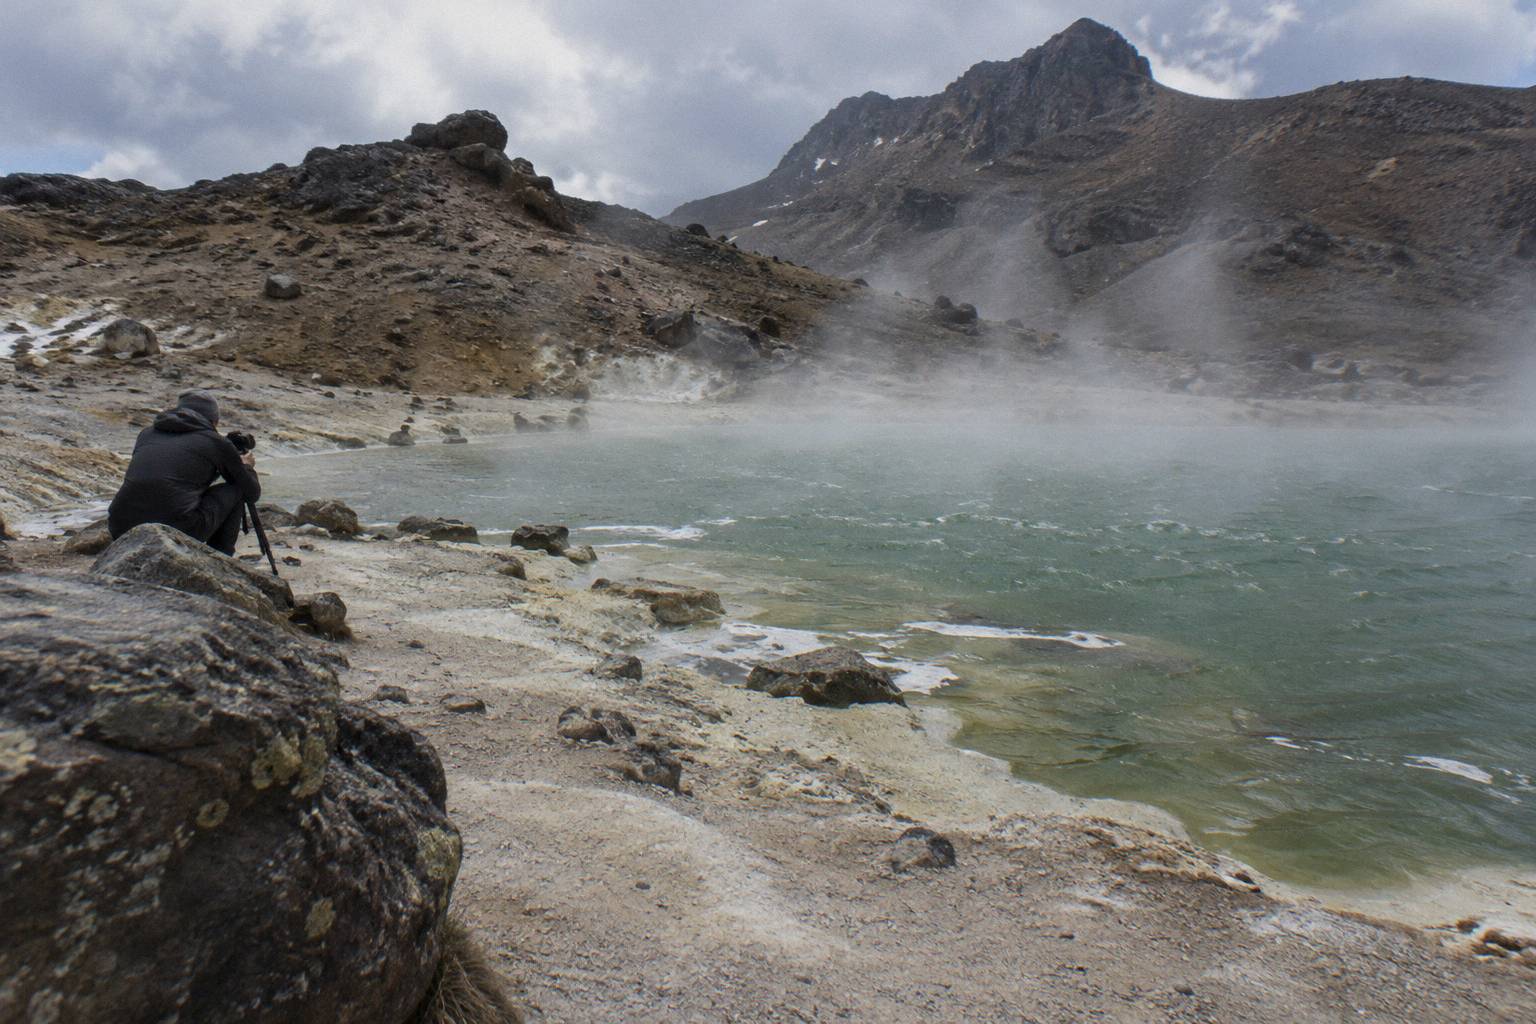
The other reason the lakes dominate Crossing photography is scarcity. There is exactly one place on the track where this view exists, and you pass through it once. Walkers who arrive in flat midday light, or in cloud, do not get a second chance unless they walk the Crossing again. That is why timing matters more here than on almost any other New Zealand day walk, and why the rest of this guide is really about controlling when you arrive.
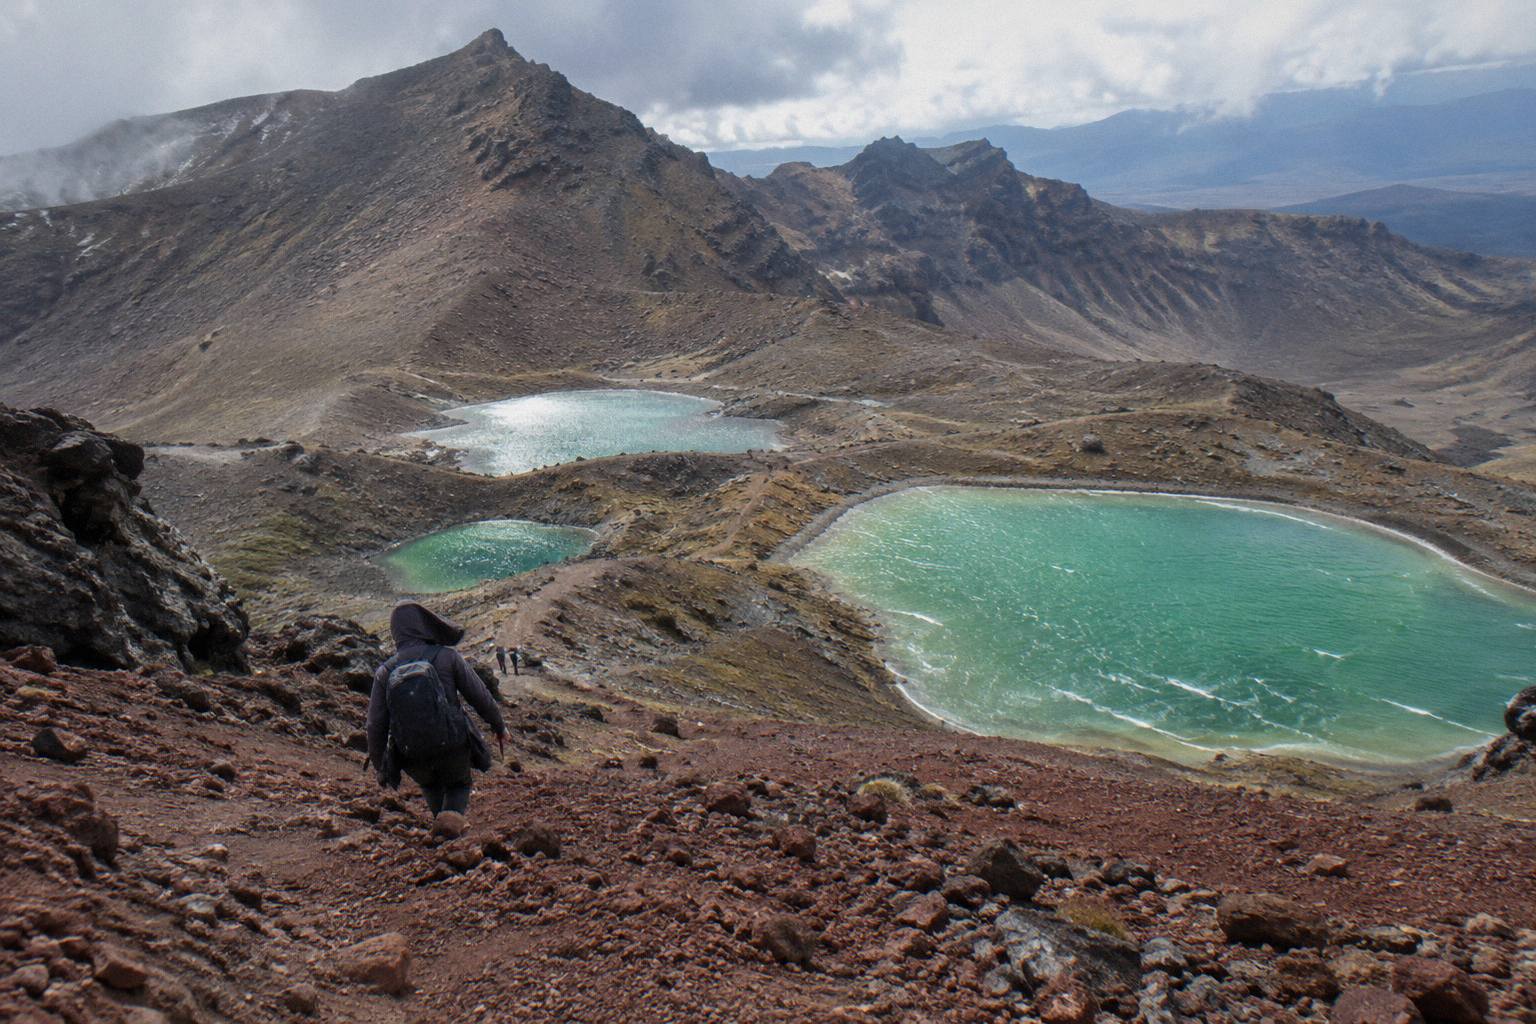
The composition also changes fast as you descend. From the lip of Red Crater the lakes read as three distinct ovals in a dark bowl. Fifty metres down the scree they start to overlap, and the foreground fills with loose red stone that gives an image depth. By the flats between the lakes the feeling is enclosure rather than overview. Photographers who know this spend longer on the upper half of the scree, where the geometry is strongest, and treat the lower section as a second, quieter subject.
A note on gear: nothing about this page needs specialist equipment. A phone handles the lakes well because the scene is about colour and shape rather than reach. Whatever you carry, keep it accessible on the descent, since the scree asks for your hands now and then, and the moment you want is the moment you stop noticing the view.
Where To Stand: Photo Spots On The Red Crater Descent
Three standpoints carry almost every strong Emerald Lakes image: the Red Crater rim as you crest it, the upper third of the scree descent, and the flats between the first and second lakes looking back up. Each gives a different picture of the same water, and together they take an hour or so of a day that runs 7 to 8 hours in the November to April season.
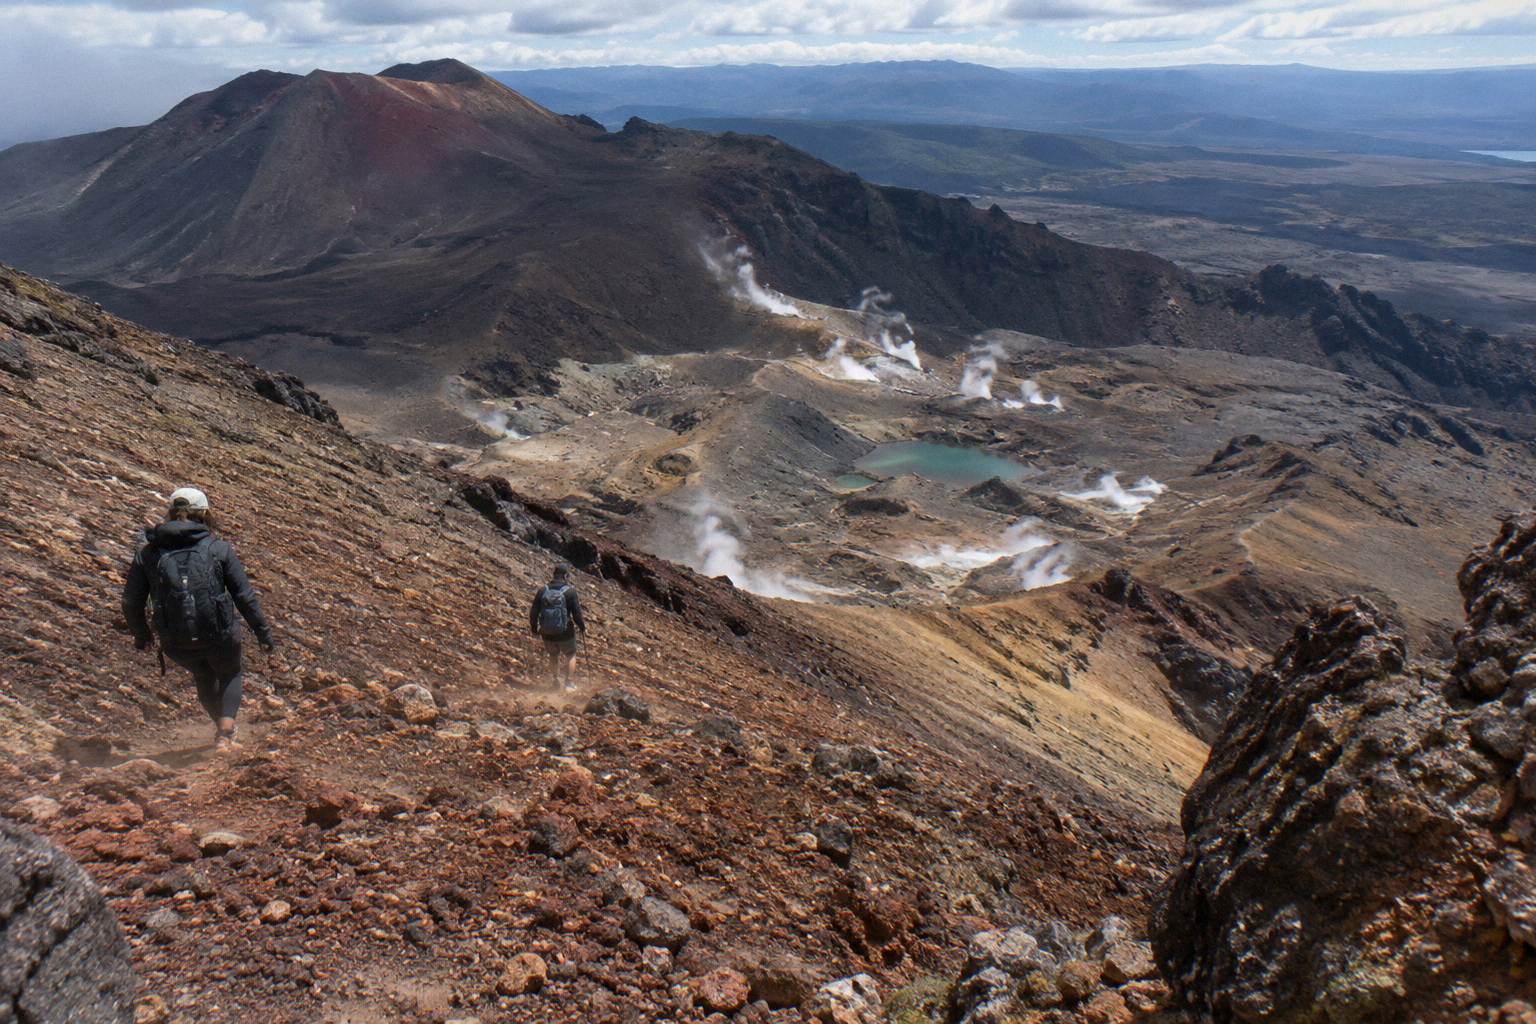
The rim is the reveal. You arrive at 1886 m with the lakes invisible below, and one step forward puts the whole bowl in frame with the Central Crater plateau beyond. This is the wide shot, the one that shows scale, and it is where a Walker's shadow can be used deliberately, long and low in morning light. Expect a crowd pause here on busy days; the track naturally funnels people into the same few metres, and patience costs you two minutes.
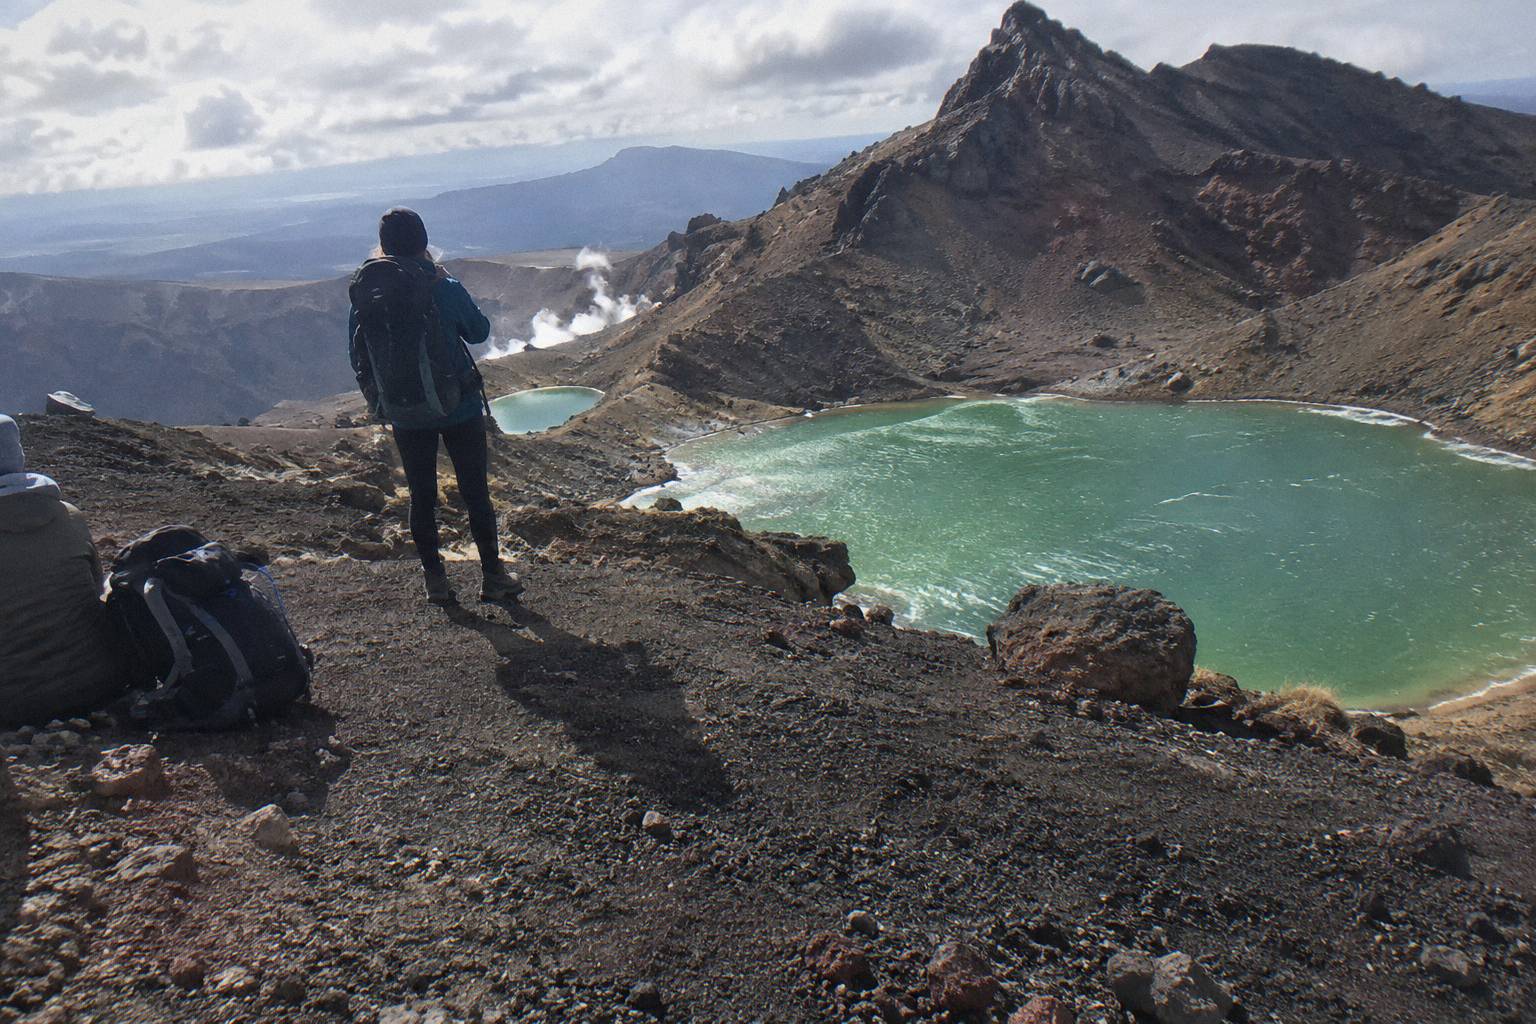
The upper scree is where the real work happens. As you drop off the ridge, the three lakes separate and the red wall of the crater fills the top of the frame. DOC calls this a steep scree descent, and it is: footing is loose, so you stop to shoot rather than shoot while moving. Compositions here favour a lone figure on the slope for scale, or the descending track line itself as a leading mark through the stone. If one section of this guide deserves extra time in your day plan, it is this one.
The flats between the lakes are the intimate option. From here you can frame single lakes with the steam vents above, or turn around and shoot back up the scree you have just come down, with walkers strung along it like beads. The view back up is under-used, and it is the shot that shows the descent's steepness honestly.
| Standpoint | What it gives | Watch for |
|---|---|---|
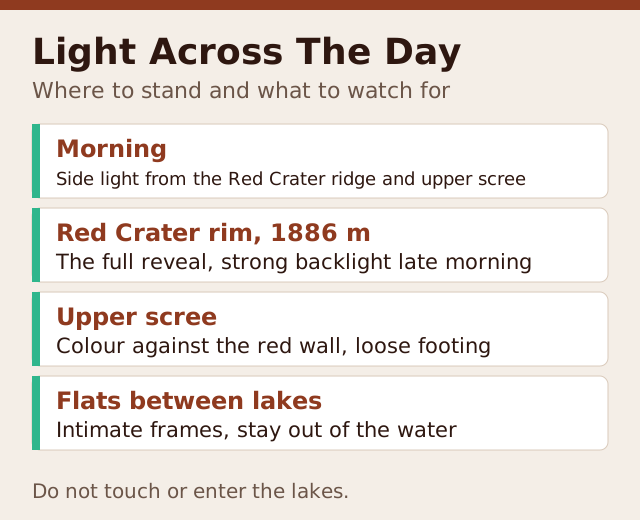
| Red Crater rim, 1886 m | The full reveal, all three lakes, widest scale | Crowds at the same lip; strong backlight late morning |
| Upper scree, first third of the descent | Colour against the red wall, depth, figures for scale | Loose footing; shoot when stopped, not mid-step |
| Flats between lakes | Intimate frames, steam vents, the view back up | Stay out of the water and off the soft thermal ground |
| Looking back from the Central Crater side | Lakes in context with the whole crater wall | Only works before you commit to the descent |
Whatever your vantage point, the request about the waterways stands. No drone-style wading shot, no touching the water for a reflection, no stepping onto the pale thermal crust around the vents. The pictures that respect the mountain are also, not coincidentally, the pictures taken from the higher, cleaner angles.
If a morning arrival at the top of that scree is the goal, the two guided options worth weighing are the Adrift Tongariro premium guided hike and the Adrift Tongariro full-day guided Crossing, rated 4.7 across 278 reviews, since a guided group moves on a schedule that lands the Red Crater section in the morning window. Independent walkers using shuttles can build the same morning, at lower cost, with a bit more planning.
When The Light Works: Timing Your Day Around The Sun
Morning is when the light works at the Emerald Lakes: early side light is the reliable choice because the lakes sit in a bowl whose west side is closed by the Red Crater wall, and the sun rakes across that wall and the water at the same time, saturating both. By early afternoon the scene turns flat and hazy, and by late afternoon the bowl sits in its own shadow, so your timing largely decides the picture.
The practical version of this advice is simple: be on the Red Crater ridge or the upper scree in the morning. That usually means an early start from Mangatepopo, since the walk to that point covers the Devil's Staircase and the South Crater traverse, the slowest sections of the day. DOC's walking time of 7 to 8 hours for the November to April season is for the whole Crossing, and photographers should budget beyond it, because stopping to work a scene on the scree eats time quickly.
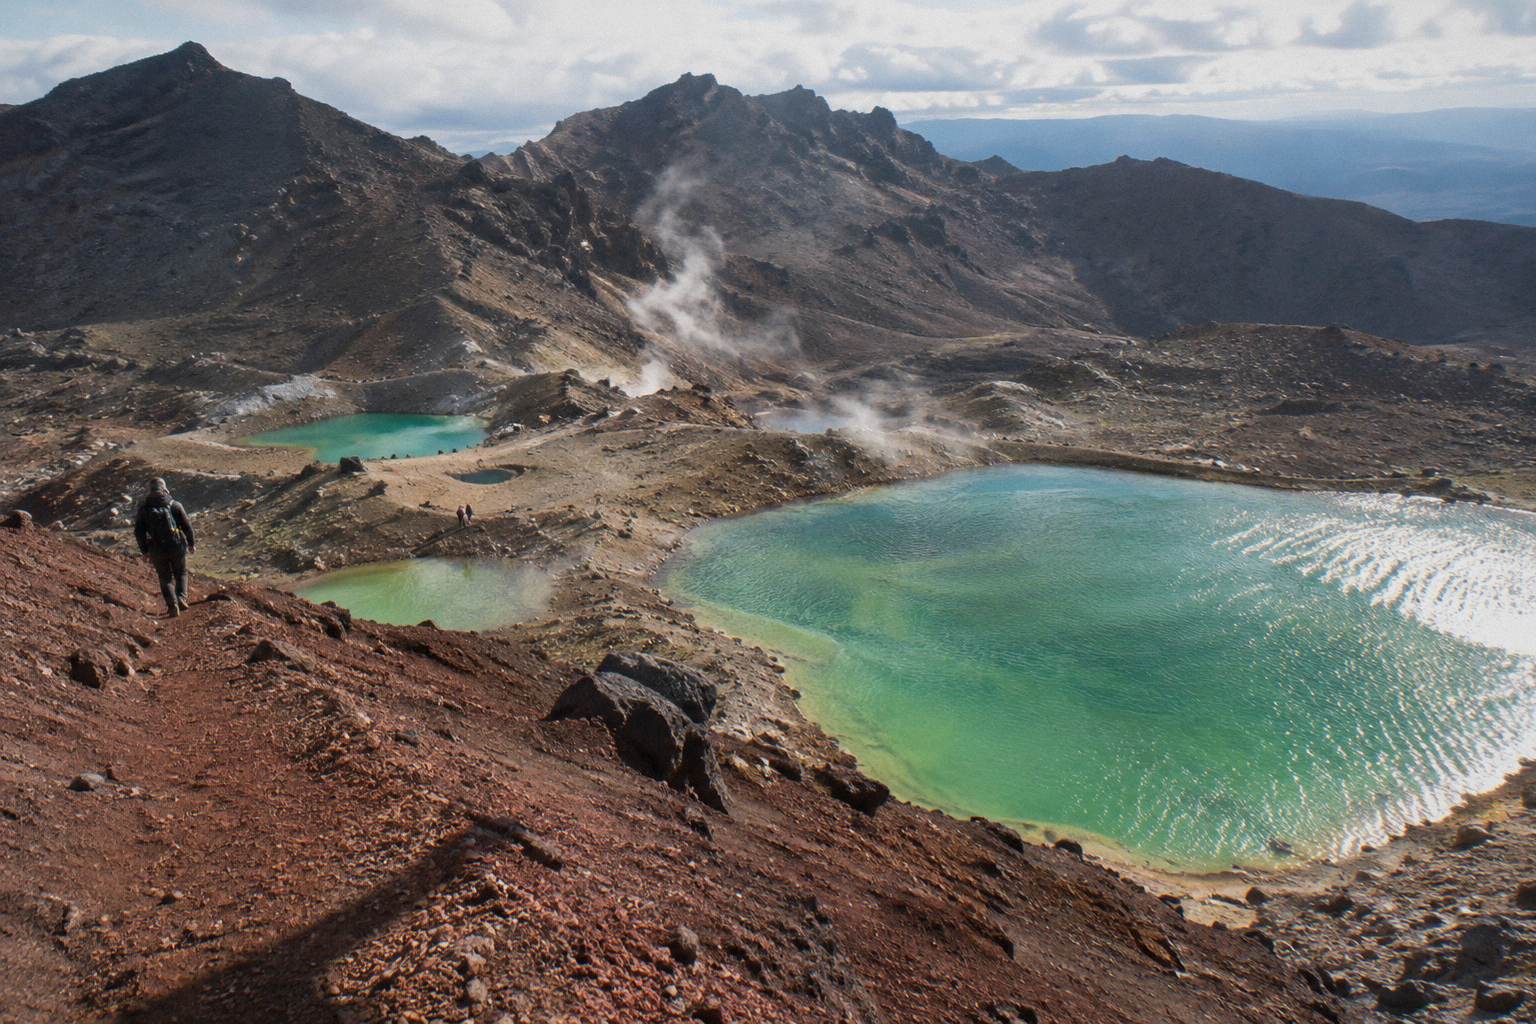
Cloud changes the rules rather than ruining them. A high overcast layer softens contrast and can make the greens read richer than harsh sun, while flat grey cloud kills the separation between the lakes and the crater wall. What you cannot plan around is volcanic and weather status: alert levels change daily, and the walk only runs when conditions allow. Check the DOC Crossing page and the GeoNet Tongariro volcano page in the days before, and treat a weather-holding pattern as the thing to gamble on, not a single forecast number.
Season matters as much as hour. In the May to October window DOC classes the route as an expert trip, with snow, ice, avalanche risk and sub-zero temperatures, and advises that alpine skills are essential and a guide is best. Winter photographs of the green pools ringed by snow are spectacular, but they come from guided winter departures, not from a solo scramble. In the summer season the trade is haze and crowds, which is exactly why the early start matters more, not less.
Photographers who want the fullest version of this timing argument, including how a pre-dawn departure reshapes the whole day, can read the sunrise start guide for the Emerald Lakes. The short version: every hour earlier you arrive at Mangatepopo buys you softer light at the top and emptier foregrounds.
Choosing A Shuttle Or Tour Around Your Photo Plan
Your departure choice sets your arrival time at the lakes, so it is a photography decision before it is a transport decision. One-way Ketetahi park-and-ride services put you on the earliest buses toward Mangatepopo; round-trip services from National Park Village and Taupo run to a fixed day shape; and the guided Adrift Tongariro tours build the whole morning around a group pace that suits photography better than a solo rush.
The one-way park-and-ride model works like this: you leave your car at the Ketetahi end, ride to Mangatepopo, and walk the Crossing back to your own vehicle. The Ruapehu Scenic Shuttles Ketetahi park-and-ride, rated 4.8 across 670 reviews and priced from NZ$68 per person with free cancellation up to 24 hours before, is the most reviewed option in that family and a strong pick for photographers who want a genuinely early start without depending on an afternoon pickup. The booking system DOC runs for the Crossing is free and recommended, and shuttle and guided bookings plug into it. More of these guides are collected on Tongariro Emerald Lakes Hike.
Round-trip services suit walkers based in National Park Village. The Tongariro Crossing Shuttles round-trip from National Park Village is the most reviewed tour here, rated 4.7 across 890 reviews, from NZ$75 per person with free cancellation up to 24 hours before, and its day shape is built around a full Crossing in daylight. From Taupo or Turangi, the Tongariro Expeditions Crossing shuttle, rated 4.7 across 431 reviews and from NZ$75 per person, covers the longer approach with the same 24-hour cancellation window.
Guided options change the equation again. The Adrift Tongariro premium guided hike, from NZ$450 per person, rated 4.6 across 242 reviews, includes transport from National Park Village, crampons and ice axes when winter conditions require them, and free cancellation up to 14 days before, which matters when your whole plan depends on one clear morning. A private guide changes the pace entirely. The Adrift Tongariro private guided Crossing, rated 4.5 across 30 reviews, lets a photographer set the stops, though note it is non-refundable, so the booking page's terms deserve a close read before committing.
| Departure option | Type | Rating and reviews | Price | Cancellation |
|---|---|---|---|---|
| Ruapehu Scenic Shuttles Ketetahi park-and-ride | One-way shuttle, unguided | 4.8 across 670 reviews | From NZ$68 | Free up to 24 hours before |
| Tongariro Crossing Shuttles round trip, National Park Village | Return shuttle, unguided | 4.7 across 890 reviews | From NZ$75 | Free up to 24 hours before |
| Tongariro Expeditions shuttle from Taupo or Turangi | Shuttle, unguided | 4.7 across 431 reviews | From NZ$75 | Free up to 24 hours before |
| Adrift Tongariro premium guided hike | Guided group hike | 4.6 across 242 reviews | From NZ$450 | Free up to 14 days before |
| Adrift Tongariro private guided Crossing | Guided private hike | 4.5 across 30 reviews | Price on the booking page | Non-refundable |
One cost detail worth knowing when you compare: DOC says part of a shuttle fee, about NZ$40, goes to conservation. Shuttles are shuttles, none of them guided, and DOC notes that shuttle buses generally do not operate through the winter window from May to late October, while guided trips include transport. Winter photographers should therefore look at the guided side of the table, not the shuttle side.
Seasonal Light And Conditions: What Each Window Gives A Camera
Summer, November to April, gives the friendliest walking and the harshest light, while the May to October window gives snow, low light and an expert route that DOC says demands alpine skills and a guide. Between them sit shoulder months where the light is often at its best and the crowds thinner, provided the weather holds and the shuttle season is running.
In the main season the sun is high for much of the day, which flattens the red of the crater wall by mid-morning. That pushes good summer photography toward the earliest possible start. The counterweight is haze: warm afternoons over the volcanic plateau soften distance, so shots that include Mount Ngauruhoe as a backdrop, and it is a magnificent backdrop, want morning clarity.
Winter is the dramatic option. Snow rims the green pools and the scree holds cold, clean light for more of the day, since the sun stays low. But DOC is unambiguous about the May to October route: snow, ice, avalanche risk and sub-zero temperatures, an expert grading, alpine skills essential, best with a guide. Winter imagery of the lakes comes from guided departures with the right gear, and crampons and ice axes are stated as supplied on the Adrift Tongariro guided tours when conditions require them, along with a clothing and footwear allowance. Bring your own lunch on those trips, since it is not included.
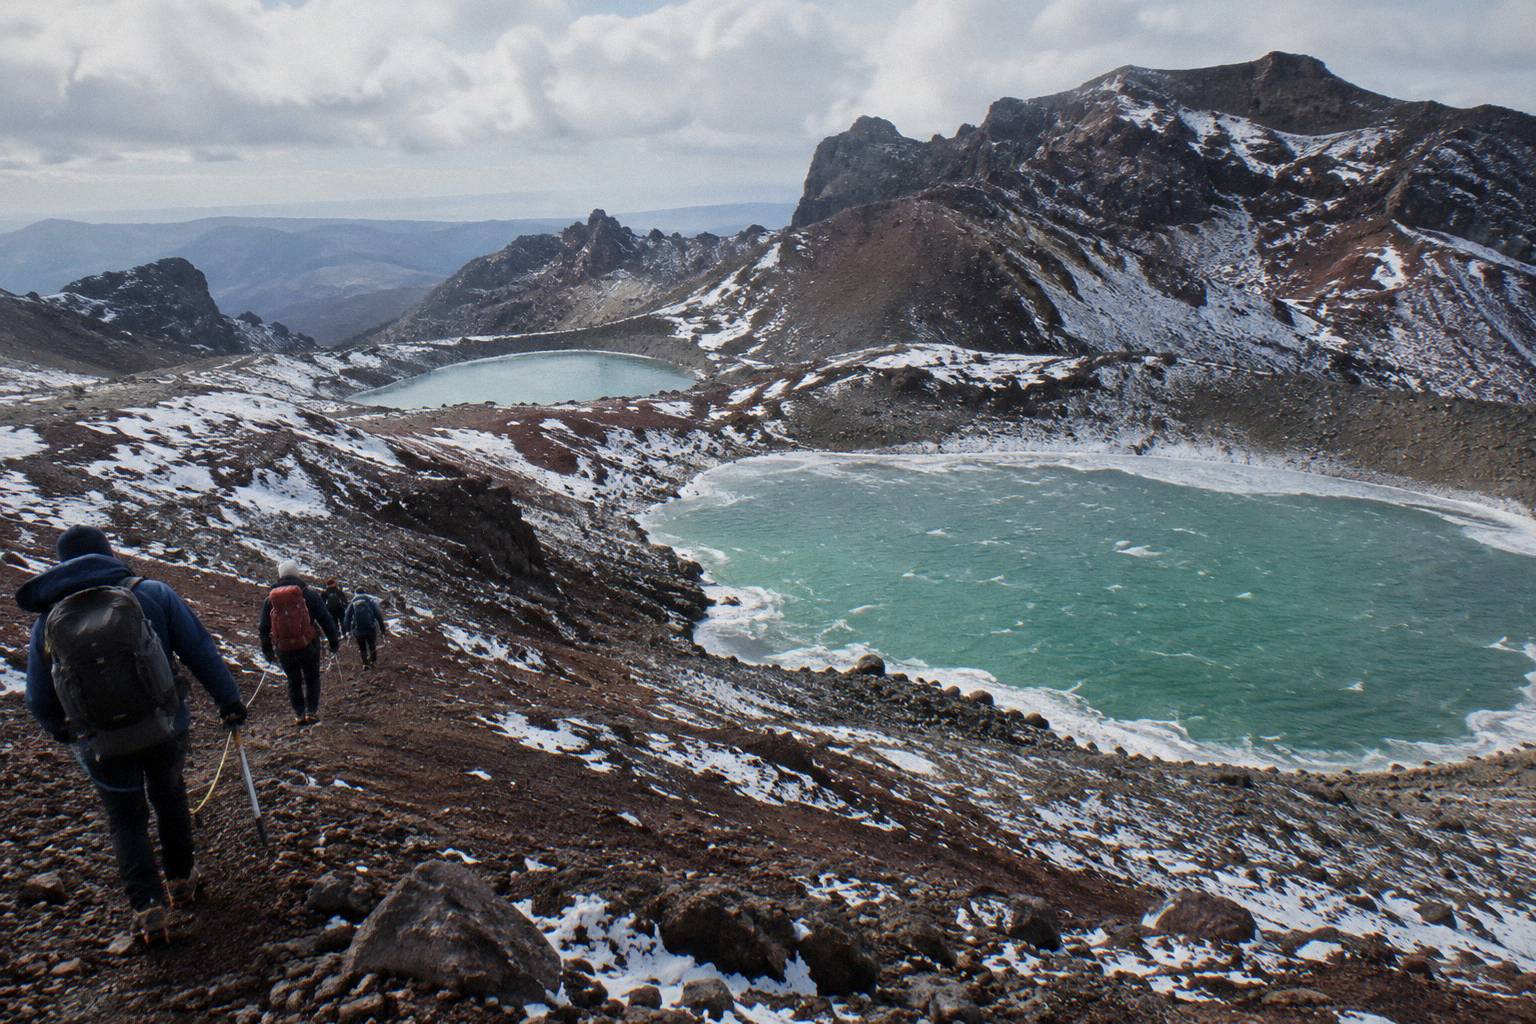
The shoulder edges of the season reward flexible planning. Fewer walkers on the track means cleaner foregrounds, and the lower sun angle colours the crater wall for longer. The catch is that shuttle availability tapers outside the main season and conditions turn quickly, so a shoulder-season photography plan should lean on the free cancellation windows most shuttles carry, up to 24 hours before, and the 14-day window on the premium guided hike. For depth on the cold half of the year, see snow and winter conditions at the Emerald Lakes.
Volcanic context belongs in your planning too. The 2012 Te Maari eruption is recent history, not ancient, and DOC maintains a volcanic-risk page for the park worth reading before any visit. Alert levels shift daily, so treat the check as part of the routine, like packing a lens cloth.
Mistakes That Ruin Emerald Lakes Photographs
Most failed lake shots come from four errors: arriving at midday, shooting only from the shore, treating the stop as a checkpoint, and planning a single day with no fallback. Each is avoidable with scheduling rather than skill, which is why the tour and shuttle decisions earlier in this guide are really photography decisions.
Arriving at midday is the most common. The lakes sit in a west-facing bowl, and by early afternoon the light is overhead and the greens go muted. Walkers who start late from Mangatepopo reach Red Crater in exactly the wrong window. The fix is the early shuttle or guided departure, not a better camera.
Shooting only from the shore is the second. The strongest geometry is above, on the rim and the upper scree, and the walk down passes through it quickly if you are not looking. Build a mental shot list before you descend: the reveal, the wide, the figure-on-scree, the view back up. Without one, the descent feels like an obstacle rather than a sequence.
| Mistake | What it costs | The fix |
|---|---|---|
| Midday arrival | Flat light, muted greens, harsh shadows | Early shuttle or guided start from Mangatepopo |
| Shore-level shooting only | No scale, no crater wall, crowded frames | Work the rim and upper scree first |
| Rushing the descent | Missed angles on the only pass you get | Budget extra time for the scree section |
| One-day plans with no fallback | A cloud cap ends the whole trip | Use cancellable bookings; watch the forecast window |
| Touching or entering the water | Disrespects the request from local kaumatua | Shoot from above; the water stays untouched |
Treating the lakes as a checkpoint is the third error. The stop deserves real time, an hour is not excessive on a photography day, and walkers who budget 7 to 8 hours straight through often give the section ten minutes. The fourth is planning without a fallback. The Crossing runs only when conditions allow, and a single locked-in day with a weather cap in it produces nothing. Free-cancellation bookings plus a two or three day window in the region is the pattern that consistently delivers the picture.
Finally, respect the water itself. The request not to touch or enter the lakes, including for a photo, comes from kaumatua Te Ngaehe Wanikau on behalf of Ngati Hikairo ki Tongariro, and it is printed by DOC on the track's own page. Every good Emerald Lakes image is made from dry ground.
The three departures below cover the main ways to put this plan into action: a guided group morning, a second guided format, and the round-trip shuttle from National Park Village.
Common Questions About Photographing The Emerald Lakes
Where Is The Best Place To Photograph The Emerald Lakes?
The Red Crater rim at 1886 m gives the full reveal of all three lakes, and the upper third of the scree descent gives the strongest colour and depth. The flats between the lakes suit intimate frames and the view back up the slope.
What Time Of Day Is Best For Emerald Lakes Photos?
Morning side light is the dependable choice, since the crater wall and the water catch raking sun together. By early afternoon the bowl flattens, and later it falls into its own shadow. No specific clock time applies year round; the principle is early.
Can I Touch Or Swim In The Emerald Lakes For A Photo?
No. Kaumatua Te Ngaehe Wanikau asks visitors to respect the maunga tapu by not touching or entering any of the waterways, including the alpine lakes, and DOC prints that request on the track page. All the strong images are made from above the shore anyway.
Do I Need A Guided Tour To Photograph The Lakes?
In the November to April season an independent walk with a shuttle works well. From May to October DOC grades the route expert, with snow, ice and avalanche risk, and recommends a guide; the Adrift Tongariro guided tours supply crampons and ice axes when winter conditions require them.
How Much Extra Time Should A Photographer Budget On The Crossing?
DOC's 7 to 8 hour summer walking time assumes steady progress. Photographers should budget beyond it, with most of the surplus spent on the rim and upper scree, where the compositions concentrate.
Can I Photograph The Lakes In Winter?
Yes, with a guided winter departure. Snow-rimmed lakes make striking images, but DOC classes the May to October route as expert, and shuttle buses generally do not operate across that window while guided trips include transport.